
A gravel cycling weekend offers a different kind of freedom from riding on paved roads. One moment, you may be rolling along a quiet country lane, and the next, you are following a dirt track through woodland or crossing an open stretch of hard-packed gravel. These changing surfaces make the experience exciting, but they also require more preparation than a familiar road ride. A bicycle that feels comfortable on smooth asphalt may need different tires, a closer mechanical inspection, and a more carefully planned setup before heading off the pavement.
Good preparation does not mean carrying every tool available or upgrading every component on your bicycle. It means understanding the route, checking the equipment that matters most, and making sure your setup matches the conditions you expect to encounter. Five simple checks can help you leave home with greater confidence and reduce the chance of preventable problems interrupting your weekend.
1. Check Your Wheels Before You Start the Journey
Wheels deserve attention before any gravel trip because they experience constant contact with uneven surfaces, loose stones, and occasional impacts. A quick inspection can help you identify problems before they become inconvenient or unsafe. Look for visible rim damage, loose spokes, unusual movement, and signs that the tires or valves need attention.
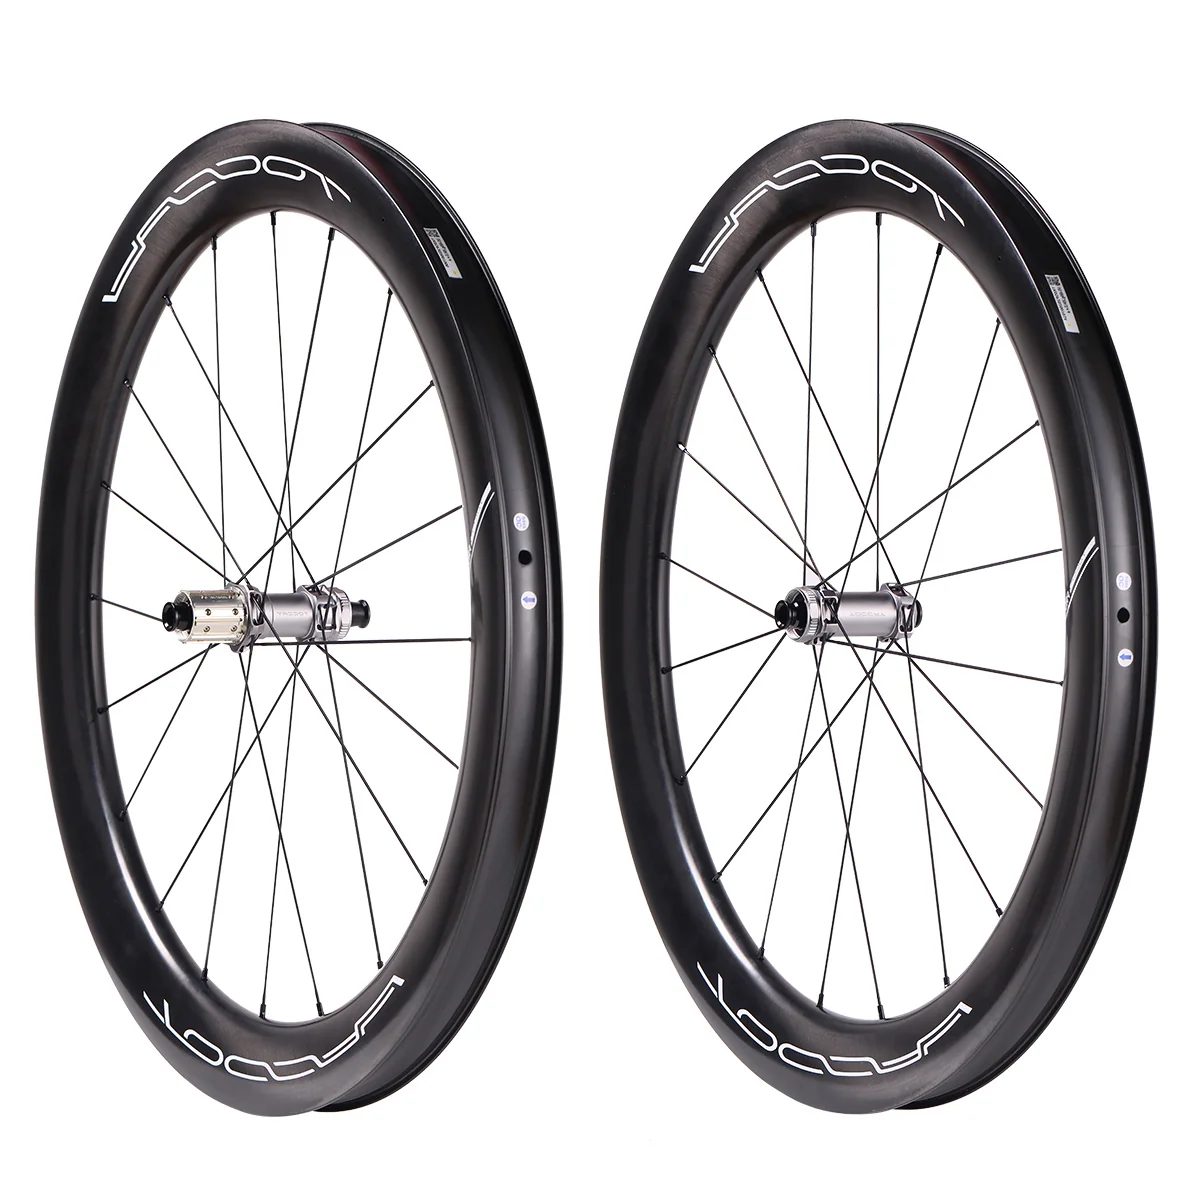
If your route includes a combination of smooth gravel, hardpack, and paved connectors, consider whether your current wheel setup suits that type of riding. Riders researching a dedicated option can examine theGhost Gravel 58 wheelset to understand the characteristics of a deeper-section gravel wheelset. The important question is whether the design matches your route, bicycle, and personal handling preferences.
Before leaving, spin each wheel and check that it rotates freely without unusual rubbing. Inspect the braking system and make sure the wheels are secured correctly according to the bicycle manufacturer's instructions. If you notice a crack, significant wobble, damaged tire, or other structural concern, have it assessed before riding.
A few minutes of inspection at home can save considerable frustration when the nearest repair shop is far from your route.
2. Match Your Tires to the Ground You Will Cover
Tires have a major influence on how a gravel bicycle feels. They affect grip, comfort, rolling resistance, and the amount of confidence you have when cornering on loose surfaces. Choosing the right tires starts with understanding the terrain rather than automatically selecting the widest or most aggressively treaded option.
Consider the Surface, Not Just the Distance
Hard-packed gravel and smooth dirt roads may work well with moderately treaded tires that roll efficiently on pavement. Loose stones, muddy sections, and rough tracks may require a different tread pattern or more tire volume for better control.
Wider tires can provide additional air volume, which may help absorb vibration and improve comfort when paired with suitable pressure. However, the widest possible tire is not always the best choice. The frame, fork, rim, and tire manufacturer's recommendations determine which combinations are appropriate.
Set Tire Pressure for the Conditions
Tire pressure should reflect the rider's weight, tire dimensions, surface conditions, and whether the setup uses inner tubes or a tubeless system. Lower pressures can improve comfort and traction on some gravel surfaces, but going too low may increase the risk of rim impacts, tire instability, or punctures.
Check the tire and rim pressure limits before adjusting anything. If you are trying a new setup, test it on a short ride before the weekend rather than experimenting for the first time far from home.
3. Review the Route and Prepare for Changing Conditions
Equipment preparation begins with knowing where you intend to ride. Gravel routes can vary significantly even within the same region. A mapped track might include smooth farm roads, loose descents, narrow paths, and stretches of pavement that require a different pace or riding position.
Download your route for offline use if mobile coverage may be unreliable. Check the expected distance, elevation gain, available water stops, and possible places to shorten the ride if the weather changes. It is also worth checking whether the route includes private roads, restricted paths, or sections that may become difficult after rain.
Weather deserves particular attention. Wind can affect handling on exposed roads, while rain may turn otherwise manageable dirt into slippery mud. Carry a lightweight waterproof layer if conditions are uncertain, and plan clothing around the expected temperature rather than the conditions at the moment you leave home.
A simple route plan should also include an emergency option. Tell someone where you intend to ride and when you expect to return, particularly if you will be traveling alone.
4. Inspect the Drivetrain and Brakes
A gravel ride can put extra demands on the drivetrain. Dust, mud, and grit can accumulate around the chain, cassette, and derailleur, increasing wear and affecting shifting. Before departure, clean the drivetrain if needed and apply an appropriate amount of bicycle chain lubricant.
Shift through the gears while the bicycle is stationary or during a brief test ride. Listen for unusual noises and check whether the chain moves smoothly between sprockets. A worn chain or poorly adjusted derailleur is easier to address at home than halfway through a remote route.
Brakes need equal attention. Check the condition of the brake pads, inspect the rotors for obvious damage, and confirm that the levers feel consistent. Disc brakes should operate without unexpected rubbing or a sudden change in braking feel.
If the bicycle has recently received new tires, wheels, or other components, allow time for a proper test ride. Confirm that the wheels are secured, the brakes work correctly, and nothing interferes with the frame or fork. Any uncertain mechanical issue should be resolved before setting off.
5. Build a Repair Kit Around Realistic Problems
Even a carefully maintained bicycle can develop a puncture or mechanical problem. Carrying a few useful supplies can make the difference between a short roadside stop and an early end to the trip.
A practical gravel repair kit may include:
- A spare tube compatible with your tire and wheel setup.
- Tire levers and a suitable pump or inflator.
- A multitool with the necessary hex keys.
- A chain quick link compatible with your drivetrain.
- A small first-aid kit and basic personal supplies.
Tubeless riders should check their sealant condition before leaving and carry equipment appropriate for their setup. Depending on the tires and route, this may include a tubeless plug kit and a spare tube for damage that sealant cannot repair. Confirm valve compatibility and bring the tools needed to use the equipment you carry.
Do not forget water, food, identification, a charged phone, and any medication or personal essentials you normally need. On a longer ride, carrying enough supplies for an unexpected delay is just as important as preparing for a mechanical issue.
Choosing TOCCAY Gravel Carbon Wheels for Mixed-Surface Riding
For cyclists considering a wheel upgrade before a gravel weekend, the TOCCAY Ghost Gravel 58 Aero Wheelset is one model worth researching. Its published specifications describe a 700C carbon gravel wheelset with a 58mm rim depth, a 35mm internal rim width, and a listed wheelset weight of 1,400 grams. The design is aimed at fast mixed-surface riding, including hardpack, smoother gravel, and paved connectors.
TOCCAY also lists the Ghost Gravel 45 carbon wheelset, with a 45mm rim depth, a stated 1,280g complete-wheelset weight, and a 35mm internal / 42mm external rim width. The deeper Ghost Gravel 58 is listed at 1,400g. These are manufacturer-listed figures, not a controlled comparison; neither rim depth alone guarantees better handling or speed. Confirm approved tire fit, frame clearance and drivetrain compatibility for the exact build.
The wide rim platform is an important detail for riders comparing gravel wheel designs, but compatibility should always come first. A 35mm internal rim width is not automatically suitable for every gravel tire. Check that the specific tire model is approved for the rim's width and design, and confirm that the mounted tire will have adequate clearance within the frame and fork.
The listed wheelset also uses a Centerlock disc-brake interface and offers freehub options that include Shimano HG and SRAM XDR, subject to the selected configuration. Confirm the exact axle standards, cassette compatibility, tire setup, and other requirements on the current product page before ordering.
A deeper rim may be useful for riders who spend substantial time on fast gravel and paved connectors, but it is not necessarily the best option for every weekend adventure. Strong crosswinds, steep technical trails, and rough terrain can change the priorities. The right choice depends on the route and the rider's comfort with the wheel's characteristics.
Consider the Benefits of a Gravel-Specific Setup
A gravel bicycle does not need the most expensive equipment to be ready for a good weekend. However, components designed around mixed surfaces can be worth considering when they address a clear limitation in the current setup.
Riders exploringTOCCAY gravel carbon wheels can compare the available product information with their existing equipment and intended routes. A useful comparison should include rim dimensions, tire compatibility, wheel weight, braking interfaces, freehub options, and the manufacturer's recommendations for use.
It is also important to consider maintenance and long-term ownership. Ask whether replacement parts are available, understand the warranty terms, and determine whether local bicycle shops can service the relevant components. These practical details matter just as much as the initial specifications.
Most importantly, an upgrade should solve a real problem. If your current wheels are reliable and suitable for the terrain, checking their condition and choosing appropriate tires may be more useful than replacing them simply because a newer product is available.
Make One Final Check Before Rolling Out
The evening before your trip, lay out the equipment you intend to carry and perform one final inspection of the bicycle. Check the tire pressure, brakes, shifting, wheel security, lights if needed, and the condition of your repair kit. Charge your phone and any navigation devices, refill your water bottles, and make sure your route is accessible offline.
Try to complete the preparation early enough that you are not rushing on the morning of the ride. A relaxed start makes it easier to notice anything you may have forgotten, from a spare tube to a waterproof jacket.
It is also wise to avoid making major changes immediately before a long ride. New tires, unfamiliar tire pressures, or newly installed components should be tested in advance so that any problems can be addressed at home.
Enjoy the Journey Beyond the Pavement
A successful gravel weekend depends on more than the distance covered or the equipment attached to the bicycle. It comes from choosing a suitable route, preparing for changing surfaces, and having enough confidence in your setup to enjoy the experience.
Checking your wheels, matching your tires to the terrain, reviewing your route, inspecting the drivetrain and brakes, and packing a sensible repair kit are five practical ways to prepare. Each step reduces avoidable risks and helps you focus on the scenery, the company, and the satisfaction of exploring somewhere new.
Whether you ride familiar country tracks or plan a longer mixed-surface adventure, preparation gives you more freedom to enjoy the unexpected parts of the journey. Leave home with a reliable bicycle, a realistic plan, and the essentials you need, and you will be better prepared for whatever the gravel road brings.